So Tuesday's seem to be the night which fitted with all of us so no time like the present and three days after the Jeep arriving in the workshop, than we were all off!
Mission: To get the engine running!
Now as we go through I will attempt to write down all of the things which I have learnt from this project so anyone who is thinking of doing a similar project can have a chuckle and maybe make less mistakes than we are surely going to!
There is one thing that has become very apparent about these little Jeep's, they were very intelligently designed. Simple to put together and pull apart! Just what you needed when someone was shooting at you. The best thing I like about the Willy's is that all the parts are interchangeable with a number of different parts made by Willy's, Ford and other manufactures. This meant you could break something and just take it from whatever parts were available.
At this point I would like to make a disclaimer I am not a WWII geek who knows everything (that is Dad's job and although he seems to have bought nearly every Willy's Jeep book on the market it will take him time to read them). I am not a mechanic and really my only experience of cars is putting petrol in them and playing with my mini 20 years ago but both Dad and Simon have a knowledge so I am looking at this as a learning experience. I will loosely try to explain what he has told me but there will probably be one or two things I get wrong so if your expecting this blog to be a wealth of knowledge it might not be up to par but I will try my best! (thinking about it I might just get Dad to write some of the blog as he now doesn't work he might have a bit more time!!!)
Information about our Willy's.
The one we have is a 1943 Ford with a Willy's engine. There seems as with every Willy's I have seen (which is only a few) has the standard mish-mash of parts from all the manufactures. I will add specs etc. as and when I come across them form anyone who is really interested.
Anyway back to the engine. The Jeep like most I think has been converted from 6V to 12V so armed with an old Audi TT battery we had a crack of getting the engine running. The reason for this is to ensure that it runs before we start the process of ripping it apart and tinkering!
Sad times the battery was flatter than a flat thing in Holland! so while we put it on the charger we went around removing the wheels and screen. That done we had another go and it turned over but before it fired up the battery died. Solution to this problem was wallet out and get a new battery and as there are not too many parts stores open at 9:30pm on a Tuesday it would have to wait till another night!
Here are a few snaps of the Jeep from the December 22nd.
 |
| Wheels off! |
 |
| The jeep with the Fuel tank removed. Note the lovely silicone sealant on the left. Used to hide rust! |
 |
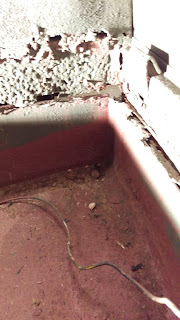
| Rust scab close up! |
 |
| Back of the fuel compartment |
 |
| Under rear wheel arch |
 |
| Attempt 2 at starting with the TT battery, Epic Fail! |
 |
| Screen off, Bonnet off! |
 |
| Not bad for an hour's work |
 |
| Seats out! |
 |
| More Rust |
 |
| Front after bumper removal |
 |
| the other side of the front + Dad's beard! |
 |
| super add on this a cut hole!! why the *%£?. Who knows? |
 |
| The best bodge I have seen in years. This was over the hole and painted green! Simon did note this pre buying so that was good (I think!) |
 |
| As the support at the back of the tub had been cut out so had the support so bodge number two was using a bit of wood, sealant and sticking this in to give it some strength!!! |
 |
| close up and yes that is electrical conduit on the left!!! |
 |
| Bodges removed! |
 |
| Engine Block |
 |
| Overall view after night 1! All said I think it still looks like a Jeep! |
No comments:
Post a Comment